Monday, June 30, 2014

Surprising Uses for Aluminum Foil


We've all been there, right? No, I'm not talking about being in the position of a character from the movie Signs, I'm talking about using that foil for (other than alien mind barriers) baking potatoes, cookie sheet covers, grilling, and not knowing what the heck else to do with it.

I ran into this problem when for a period of time I thought it wise to buy rolls of aluminum foil every time it was on sale for $1. The sale occurred frequently, so frequently in fact, that I recently discovered another roll of it out of place in my spice cabinet because it could not fit in the drawer with the other rolls. Yes, that's plural.

Well, what's a non-conspirator to do?

Thanks to Reader Digest's publication of More Extraordinary Uses for Ordinary Things I learned some impressive uses for aluminum foil.

1. Scour

Tin foil is rough enough to scour plates, pots, pans, and baking dishes to a state of utter perfection. I used to buy copper scrubbers, but tin foil works much better! Plus, food doesn't really stick to it making it usable for longer. Simply crumple in a ball and use until its filthy. Generally, after I bake a potato, I crumple the tin foil and store it under the sink for extravagantly grimy dishes. It usually lasts me a few weeks.

2. Remove paint from table or crayon from wall

I have a white lacquered table which had acrylic and oil paint splatters on it thanks to my messy, five year old self. I used a cleaning solution from Maidorganic which I have seen take off crayons from wooden surfaces (I used to be a house cleaner for the company)! I sprayed and sprayed and scrubbed really hard, but nothing worked. I came to accept that my table was going to have to stay that way -  until I tried crumpled foil. Instead of a rag, I scrubbed the paint stains with tin foil on the wet surface and they came right off! It took some elbow grease but it worked like a charm! The best part is because the tin foil was wet, the edges became flattened and didn't scratch the surface. I am not sure how this would do with untreated and varnished wood surfaces, but it should work wonders on walls with crayon markings. *Note: I did use a bit of vinegar which added TONS of cleaning strength!

3.  Alternative to Dryer Sheets

I have yet to try this, but supposedly, crumpled foil can be used in place of dryer sheets to remove static from laundry. Just throw a few foil balls in the dryer with your damp laundry. I have read about others doing this with no problem, while others say it doesn't work. It's definitely worth a try should you need a standby.

4. Camping Gear

Next time you go camping, don't forget the foil! Spreading a large piece under your sleeping bag will prevent dampness. Packing foil will also save you weight and space in bags as it can be used for makeshift utensils, plates, and pans. I personally haven't been camping in years, but next time, I am definitely bringing some.


A little foil can certainly go a long way. I feel better prolonging its use after baking. I am never buying copper scrubbers again!

Tuesday, June 3, 2014

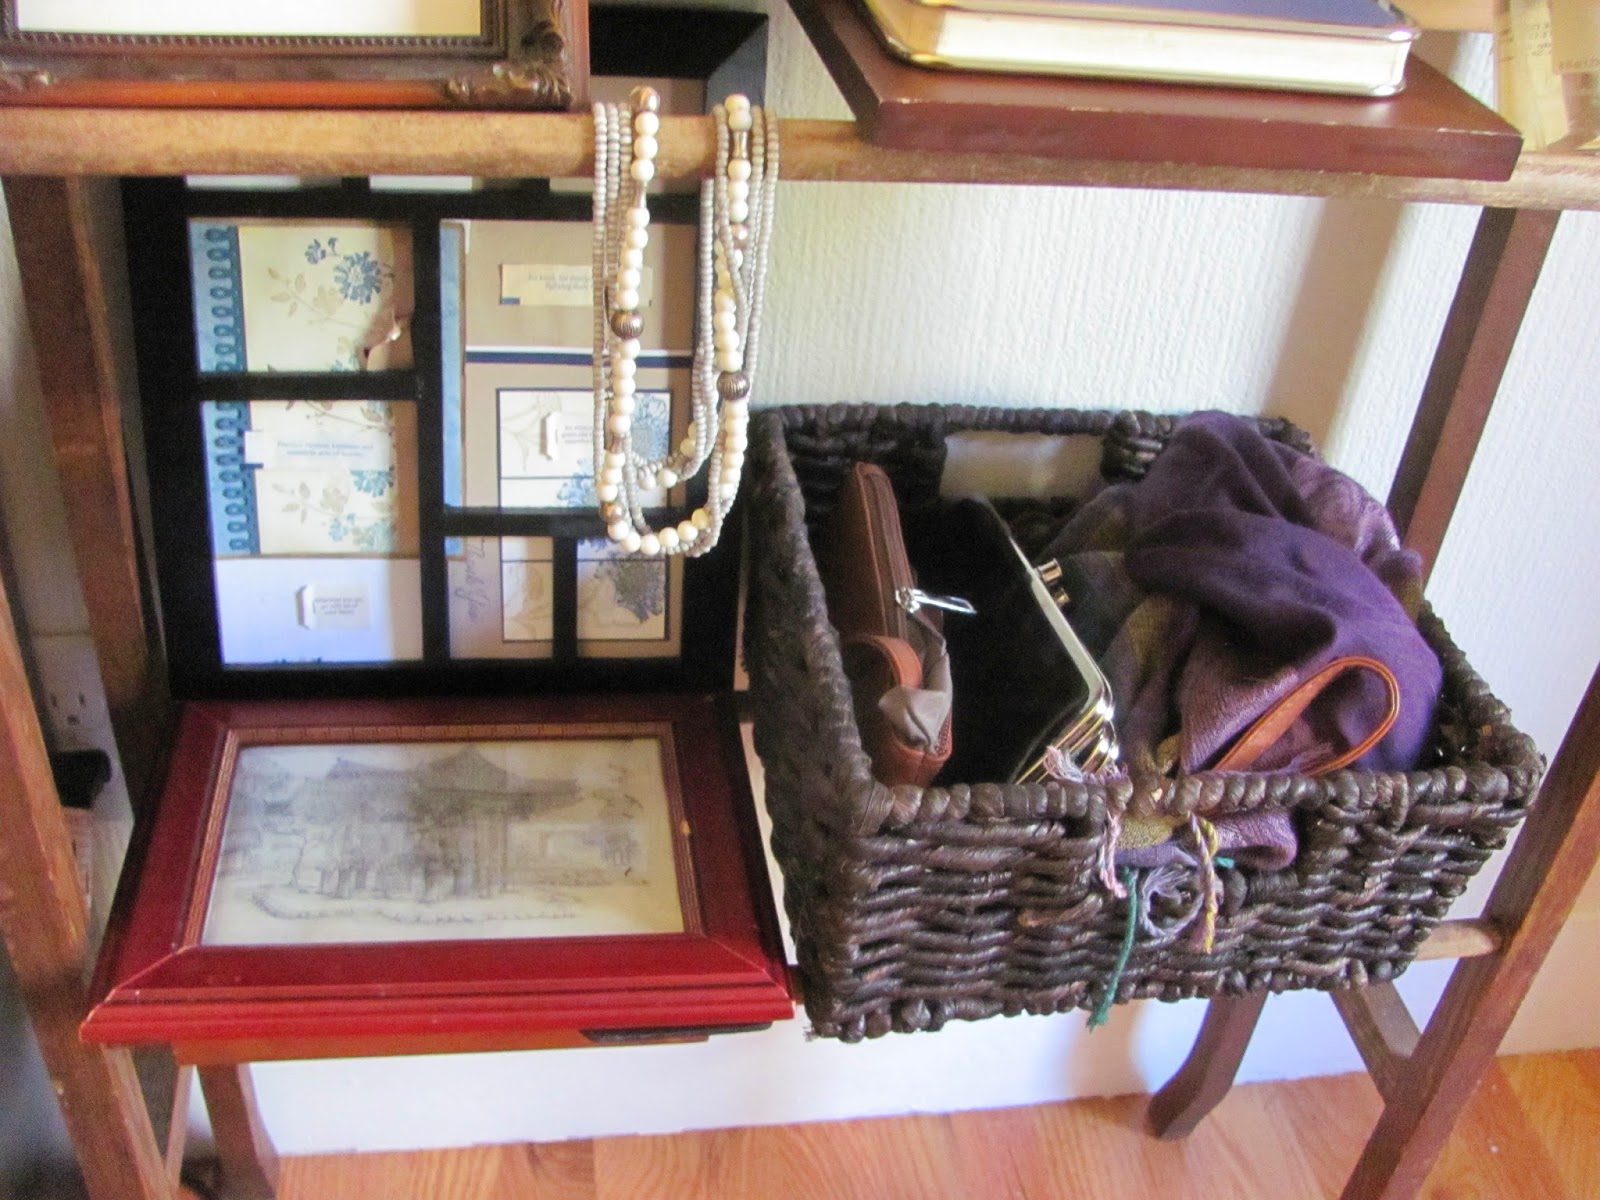
Alternative Uses for a Quilt Rack

The most difficult inconvenience that comes from living in our rented apartment is refraining from putting holes in the walls. 


In our place the only way things get hung is a) with a thumbtack and b) if there is a hole already in the wall. I bought two new shelving units and can't even hang them! It's so frustrating! 

Instead of covering up the damage when we move out, I think it is easier to come up with solutions around hanging. 

Easier said than done.

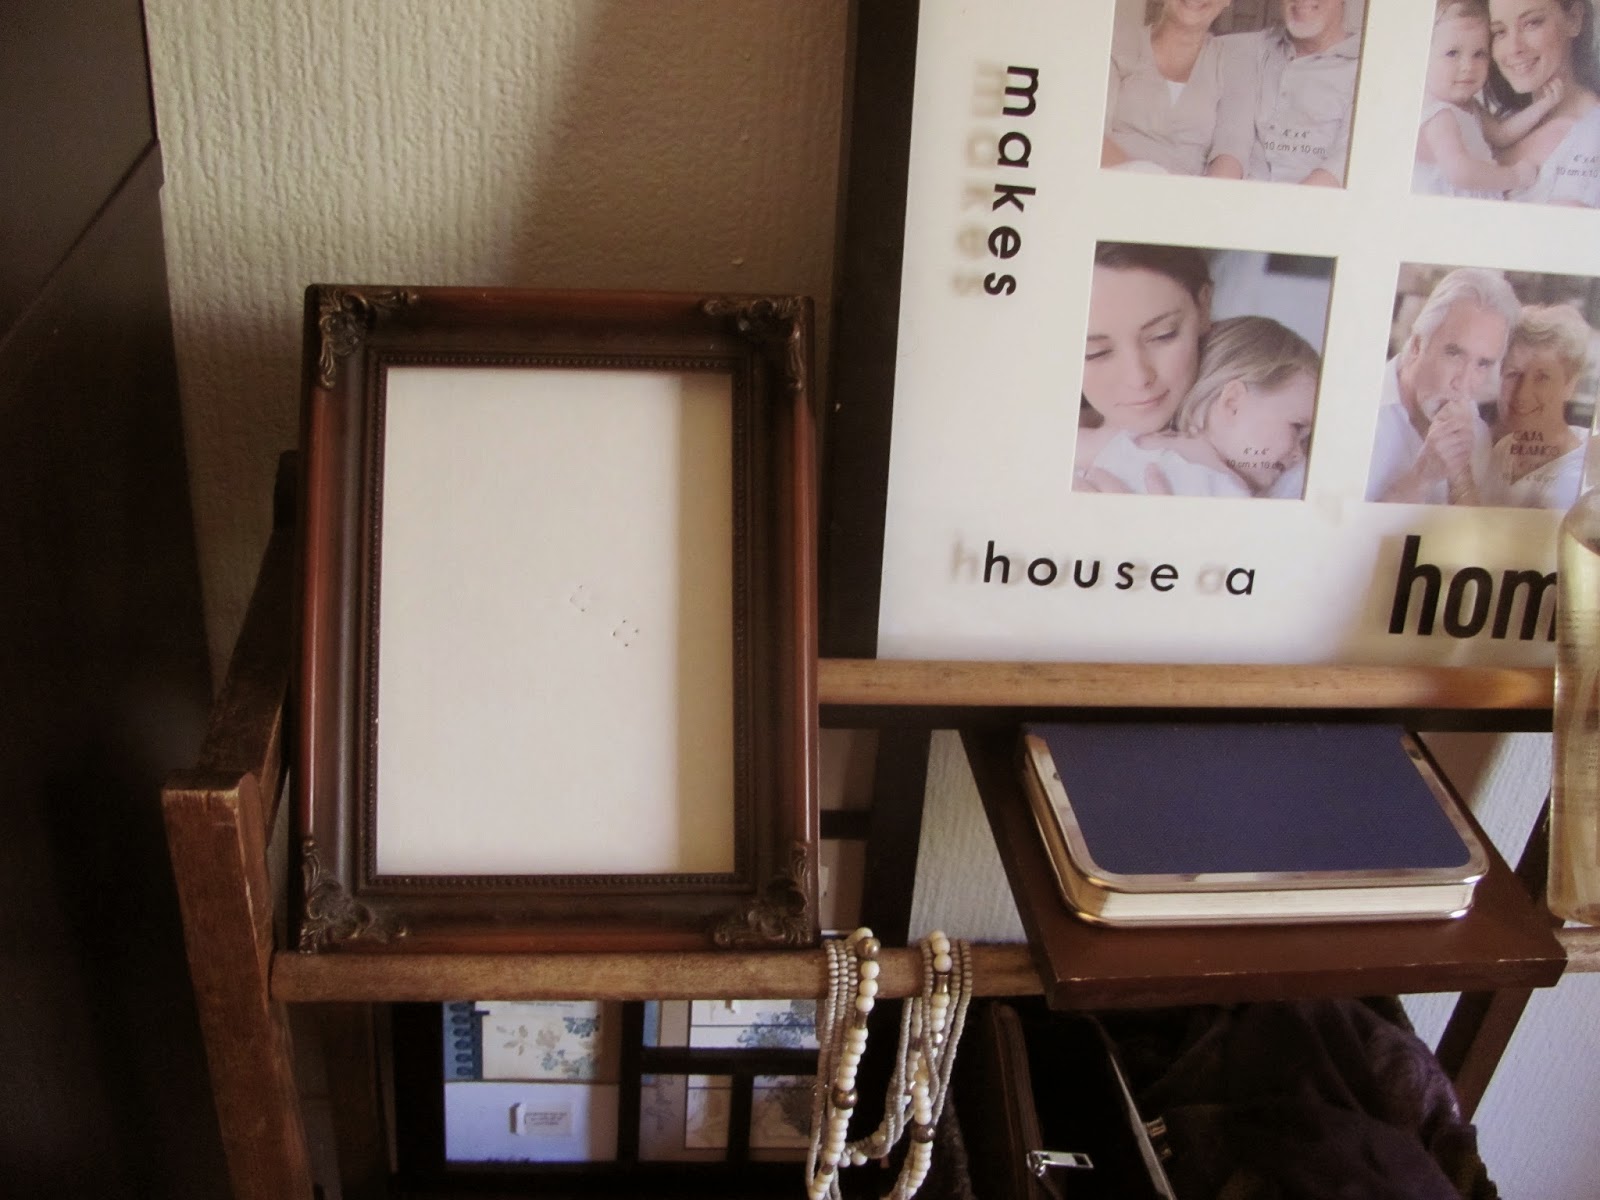
I have stuff lying around and I can't take it anymore. My solution - at least for one room - is an antique quilt rack gifted to me by a dear friend.

This up cycle demonstrates how to use these handy contraptions for the following:

1. Hold bottles by hanging nozzles or balancing against center and top rungs
2. Balance boxes and baskets on bottom rungs
3. Hang your scarves and hats
4. Add hangers for secondary closet space
5. Hang your jewelry
6. Create extra shelving for books, artwork, and pictures

I'm sure you have heard of ladder shelving. Well, quilt shelving will soon be the trend to follow!

You've seen it here first, now let's get crackin'.
Grab your grandma's quilt rack and find shelf stabilizers. I used empty picture frames and turned them upside down. Don't have any? Try shoebox tops, books, binders, notepads, or even cardboard.

Place them according to your display preference. I placed mine sporadically. You can line a whole shelf if you want.

Put your picture or artwork on the frame.

Repeat until you finally like what you see. It took me a good five tries.


That settles it. Nails aren't necessary for heightened organization after all. 


Hope this gets your creative juices flowing!  Think of me when you see "Quilt Shelving" on Pinterest! ;)

Thursday, May 29, 2014

HOARDING CRAFTS: WHEN IT HELPS, WHEN IT HURTS

When I hear the word hoarding, my mind is immediately flooded with horrifying pictures from the TV show Hoarders. I imagine stacks of papers to ceilings, rotting vegetables, and mounds of garbage in a living room.


The Google dictionary defines hoarding as:
:  a temporary board fence put about a building being erected or repaired —called also hoard
 Hoarding is a billboard.

Thanks, Google, for once again attempting to prove smarter than the human mind and revealing my inept ability in correctly speaking the English language.

It seems I should be researching  to hoard - let's try again.

Google defines hoard as:


    1. amass (money or valued objects) and hide or store away.

      "thousands of antiques hoarded by a compulsive collector"


Okay, that's pretty bad. But what if you find something and you swear you will use it in good time for a specific purpose?

If you come across a good deal on things you KNOW you will use, I think hoarding is completely acceptable. Here are some tips if you're thinking about hoarding some items for crafts.

First thing is to know what you have!

This is so important. I can't count the number of times I have gone out of my way to purchase something only to find that I DID have it all along. Nothing is worse than wasting time and money on what was never needed in the first place.

Before stockpiling for craft projects ask yourself:

       1. Do I have a plan for it?

       2. Do I have a place for it?
       3. Do I have a budget for it?
       4. Can it be used in multiple ways or multiple times?

If you answer NO to any of these questions, it is probably best to pass on bringing it home or keeping it. The point of appropriate hoarding is to have things on hand to make something. Ultimately, your goal should be to save money. If your purchase won't save money in the long run, don't buy it!

Another thing is to set a price ceiling.

Here are a few items I collect and the maximum price I will pay for them:

        1. Natural wood and antique frames - $1.00

        2. Ribbon - $3.00
        3. Tissue paper and gift bags (save from gifts) - $0.00  I only reuse!
        4. Baskets - Depends the size and quality.
        5. Wood trays $3.00
        6. Stuffing for pillows - $0.00 - I only reuse!

By setting these standards, which may seem unrealistic, I am forced to go to thrift stores, consignment shops, Good Will, Craigslist, Ebay, and tag sales for my all of my craft needs.
I also buy clearance at commercial craft stores like Michael's and A.C. Moore.

I also try to make sure my creations will create profit. If no one will buy what I am making, or if I won't use it myself, I often find myself re-thinking projects and going through my inventory.

What collecting shouldn't be is doing it out of compulsion, anxiety, paranoia, or just because you can.

My fortune teller and tea tag collage board is a perfect example of how I successfully utilized (and diminished - which is a plus!) my resources of cards, frames, and fortune cookie tellers and tea tags.


It's surprising how drastically a single project can deplete your stockpiles, so at times, more is better.

Keep your resources simple and try to DIY as often as possible!

Hopefully, your hoarding will HELP your projects. If it is hurting your space, wallet, time, and relationships, then deplete your resources and purchase as you need them. Not all of us find it easy to manage time and resources in advance of their use, and that's okay, too.

Stick to these tips and your aggravation should be spared no matter how you gather your craft ingredients.

Happy Hunting!


FORTUNE COOKIE TELLER AND YOGI TEA TAG COLLAGE BOARD

I am a hoarder.


Of fortune cookie tellers and Yogi tea tags.

Does anyone else share this problem with me?

I only hold on to those I find humorous or inspirational, but after there's a stack of 'em on the fridge, or on the counter, I realize two things:
          
                 1. I eat far too much Chinese take out
                 2. I do not drink enough tea, but spend too much money on Yogi tea

Who needs discipline when you have creativity? Am I right?

Instead of cutting down on Chinese food and Yogi tea splurges, I find it helpful to justify my irrational behavior by making these teensy useless papers necessary for everyday life.

My solution is a fortune cookie / Yogi tea tag collage board. It's just a cool way to get all these paper friends together and make a party of their presence. I like orderly art, so I used a picture frame I had with multiple windows. As matte under the fortune cookie tellers and tea tags, I used pretty cards I saved (hoard) from birthdays, etc..


ONE: Select frame and separate glass from base


TWO: Use marker (Sharpie is best) to trace frames.


THREE: Cut matte to size and glue. Allow to set and dry and glue fortunes / tags to matte.


I was lazy here and after all that tracing decided to glue their entire base surface. This was a FAIL!

The glass shattered as I was reassembling the frame because the card stock was too thick between the frame and glass.

Therefore, I recommend cutting the matte to size the glass frame.
FOUR: Glue fortune tellers and tags. Allow glue to set and dry. Reassemble frame.
FIVE: Hang and admire.

This didn't come out as pretty as I hoped, but I still like the idea.

Another idea is to take your collection and put them in a bowl on your coffee table and let guests pick them as a fun accompaniment with dessert, or invent a game with them.

There is no wrong or right thing to do with these. However you use them, it is a great way to brighten a room and add some thoughtfulness to your day.

Happy Creating!

Friday, April 11, 2014

Pantry Staple Alternatives You Already Have

It's funny. I never really understood why pantry staples were considered staples. I mean, I try to stock up when I can. I've even checked off lists I found online. But, I don't really use them! 

Well, I finally get it, now!

Staples aren't necessarily cans or jars of stuff to have on hand "in case" you need a quick fix meal, as I demised.  No, no. Staple ingredients are a base for other staples!

I suppose a staple would be different for every person.  Key ingredients vary with diet restrictions and preference.  This gal prefers stuff to create her own flour, milk, and baking additions.  


My Choice of Staple Ingredients:


These ingredients get way more bang for your buck because of their many methods of use.  Personally, I plan to buy oats and rice in bulk to use as flour bases while using them as ordinary meals. 

Here a few simple ways I plan to maximize my purchasing power:

The Methods:
      1. oats, almonds, or rice + grinder = flour
      2. almonds or rice + boiling water + time =  milk
      3. cocoa + agave + oil + heat = chocolate sauce
      4. chocolate sauce + freeze & chop = chocolate chips
      5. vinegar + milk = buttermilk
      6. peanuts + blender = peanut butter

Yes, creating these concoctions is way less convenient than purchasing from a grocery store.  But, the health benefits are exponential.  

Fresh flour made at home contains far more nutritional value than flour packed, shipped, and sedentary on shelves.  Also, home made means no unnecessary additives! It's pretty fantastic to be able to pronounce every word in your food :)

It will take adjusting, but the fulfillment of being able to supply my own pantry is an added benefit to learning patience up the wazoo.  

Cheers to no more frantic Big Y runs for a single bag of chocolate chips only to walk out with an entire cart of unplanned groceries!

Thursday, April 10, 2014

Everything from Scratch: My Goals to Eat Healthy and Save Money

http://www.ucsf.edu/sites/default/files/legacy_files/sugar-infographic1.jpg
I know it's sad, but Yahoo! is my primary source for news.

It is unfortunate, but the perk is Yahoo features headlines and articles like this on the same page.  

Now is a good time to admit my fanaticism for organic and local foods; I firmly believe everyone should be given a plot of land and learn self-sufficiency. Food is our medicine, and unfortunately, greed is precedent over consumer health. I digress.

There. Now you know why the article on Yahoo! (featured within a myriad of celebrity gossip) caught my attention. 

Supposedly, a family omitted (unnatural and added) sugar intake for an entire year.  The results?  

More energy, stronger immune systems, a distaste for sweets, and a cleaner diet.  

The entire time I read the article I was thinking of the massive jar of sugar I have on hand for baking and adding - in enormous amounts - to coffee.  

Well, after hearing about their experience, there are only two words to describe how I am feeling . . . 

...Challenge Accepted.


Maybe it won't last for a year, but I solemnly swear to READ the labels of every food purchase.  I don't buy processed foods too much , but I will dedicate even more time to creating home made snacks and meals and leaving the sugar out!

My progress so far?  

-Home made pizza dough and granola (in place of cereal)

YEA! I am on my way!             <---that is sarcasm

My goal is to expand to bread, milk (almond or rice), snacks, peanut butter, and well, everything. I am most excited for the summer to can fresh veggies! 

It won't be easy, and it won't be cheap upfront, but learning to use ingredients in a variety of ways saves big bucks.  Give it a try and see how much your creativity can save you!


Tuesday, March 25, 2014

UGH...and DIY Scarf Pillows

I did (or should I say, didn't?) it again.

It's been over a month and I didn't post anything!

I've no excuses, really. But, I can tell you that I am at the moment preoccupied with a relocation to Massachusetts.  The boyfriend got a job transfer near there, and we selected an apartment in Salem.  I am super excited about it! It is a gorgeous place to live - quite touristy - but that's a good sign, I think.

Our new place is minutes from the marina, beach, and there is tons of parks and trails.  Also an amenity is the local dog park. Seems like we will have no troubles feeling at home there!

Lots of packing, Goodwill runs, and E-Baying going on right now.  All that to say, A Dash of Effort has been neglected :(  

These changes have brought on opportunities to declutter and think about my vision of our future home.  I already am beginning preparations for container gardening, and this time, I am opting for a minimalist approach to decorating.  That being said, I will have lots of inspiration for new posts!

Today I spent lots of time on Apartment Therapy and came across this awesome DIY scarf pillows article.

This is dangerous because I find lots of scarves at thrift stores.  Whenever I find ones I like, I am able to stave off temptation because I don't really wear scarves. But, with this tutorial...the possibilities are endless!

Do you have any DIY tips for pillows?